How to Smoke Baby Back Ribs at 250°F
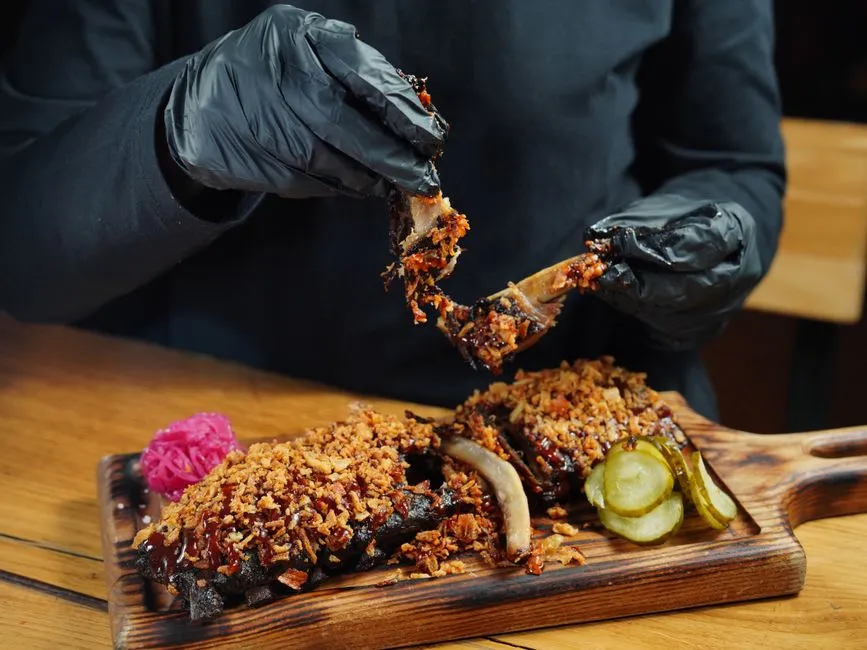
- Smoke two racks unwrapped at 250°F
- Ingredients for two racks
- Set up the smoker outdoors
- Trim and season without cross-contamination
- Follow a 250°F no-wrap timeline
- Separate temperature control from tenderness
- Use three tenderness cues together
- Should you wrap baby back ribs?
- Glaze only after the ribs are nearly tender
- Diagnose a result you want to change
- Cool and reheat leftovers safely
Smoke two racks unwrapped at 250°F
This method cooks two racks of baby back pork ribs, each about 2 to 3 pounds, unwrapped at a grate-level 250°F (121.1°C). Plan on roughly 3 1/2 to 4 1/2 hours, plus a 10-minute rest. The clock tells you when to start checking; a deep bend, small bark cracks, and little resistance between the bones tell you when the ribs are tender.
Ribs become food-safe before their connective tissue reaches the texture most people expect from barbecue. Use a food thermometer for the safety check, then use texture cues for the finish. One number should not be forced to do two jobs.
Ingredients for two racks
- 2 racks baby back pork ribs, about 2 to 3 pounds each
- 2 tablespoons yellow mustard or neutral oil, as a binder
- 2 tablespoons packed brown sugar
- 1 tablespoon sweet paprika
- 2 teaspoons kosher salt
- 2 teaspoons coarse black pepper
- 1 teaspoon garlic powder
- 1 teaspoon onion powder
- 1/4 teaspoon cayenne, optional
- 1/2 cup barbecue sauce, optional
- Dry hardwood chunks suitable for cooking and your smoker
For one rack, halve every measured ingredient: use 1 tablespoon binder, 1 tablespoon brown sugar, 1 1/2 teaspoons paprika, 1 teaspoon each salt and pepper, 1/2 teaspoon each garlic and onion powder, 1/8 teaspoon cayenne, and up to 1/4 cup sauce. For four racks, double the original list only if the cooker can hold them with clear space for indirect airflow.
Prepared mustard and barbecue sauce can contain allergens. Check every label, including Worcestershire sauce or other ingredients in a house sauce. Keep raw pork refrigerated and separate from ready-to-eat food.
Set up the smoker outdoors
Use a purpose-built smoker outdoors according to its manual and local fire rules. Keep it away from doors, windows, vents, structures, dry vegetation, and combustibles. Never operate a charcoal, wood, propane, or natural-gas smoker in a home, garage, carport, tent, or other enclosed or partly enclosed space.
The CDC's carbon-monoxide guidance states that grills and other fuel-burning devices should never be used inside a home, basement, garage, or camper, or outside near an open window or window air conditioner. Carbon monoxide is odorless and colorless and can cause sudden illness or death. If anyone develops headache, dizziness, weakness, nausea, chest pain, confusion, or loss of consciousness around combustion equipment, move to fresh air and contact emergency services.
Build an indirect fire and stabilize the grate-level temperature at 250°F (121.1°C). Put a reliable air probe near the ribs without touching the grate or meat. A lid thermometer measures a different location and may not match the air around the food.
Follow the cooker's fuel, vent, water-pan, grease-management, and shutdown directions. Weber's water-smoker setup, for example, places 225°F to 250°F within its normal rib-smoking range and uses the lower vents to control temperature while leaving the top vent open. That describes its water-smoker method, not a universal vent setting. Use your own manual.
Establish a clean-burning fire before adding food. Our clean-smoke fire-management guide explains the coal bed, airflow, and wood rhythm.
Trim and season without cross-contamination
Work on a clean tray or board reserved for raw meat. Remove loose scraps of fat or bone. If a papery membrane remains on the bone side, slide a blunt table knife just under one corner, lift it, grip it with a paper towel, and peel. Do not force a sharp knife toward your supporting hand.
Do not rinse raw pork. USDA's fresh-pork guidance says washing is unnecessary; splashing can spread contamination around the sink and nearby surfaces.
Mix the brown sugar, paprika, salt, black pepper, garlic powder, onion powder, and cayenne until no concentrated pockets remain. Coat the racks lightly with mustard or oil. Divide the rub by sight into two equal portions, then season both sides and the edges of each rack. This keeps the first rack from quietly receiving most of the salt and sugar.
Let the ribs stand only while the smoker stabilizes. If the cooker needs more time, return the pork to the refrigerator. Wash hands, utensils, the board, and contacted surfaces before handling clean trays, thermometer controls, or sauce.
Follow a 250°F no-wrap timeline
Place both racks bone-side down over indirect heat with space between them. Close the lid and confirm that the grate probe returns toward 250°F after the cold food is loaded.
| Elapsed time | What to do | What you are looking for |
|---|---|---|
| 0:00 | Put ribs on and close the cooker | Indirect heat, steady airflow, no contact with flame |
| 0:15 onward | Manage the fire | Recovery toward 250°F without frantic vent changes |
| 2:00 | Make the first planned surface check | Rub looks set rather than wet or easily smeared |
| 3:30 | Begin checking the thinner rack | Deep bend, small surface cracks, low probe resistance |
| Near finish | Add a thin glaze if wanted | Sauce sets without scorching |
| Finished | Move to a clean tray and rest 10 minutes | Juices settle and the rack is safer to slice |
The schedule is a workflow, not a promise. A thin rack may finish before a thick one. Starting temperature, wind, rain, cooker material, airflow, fuel, and how often the lid opens all change the time. Remove each rack when it is ready instead of making both obey the same minute.
For the first two hours, manage the cooker rather than repeatedly opening it. Add fuel and dry cooking wood in modest amounts according to the smoker's procedure. Keep the exhaust open unless the manufacturer specifies otherwise. Heavy, stale smoke, soot, or a smoldering oxygen-starved fire can make the surface bitter.
At the two-hour check, rotate the racks only if the cooker has a verified hot side. Spritzing is optional. Repeated spraying drops the surface temperature and can lengthen the cook, so skip it unless exposed edges are drying unusually fast.
Separate temperature control from tenderness
Check pork temperature in the thickest available meat between bones, away from bone, fat, and gristle. Because baby back meat can be thin, take readings in more than one place. A reading against bone does not represent the center of the meat.
FoodSafety.gov's current chart gives 145°F (62.8°C, commonly rounded to 63°C) plus a three-minute rest for pork steaks, roasts, and chops. This recipe verifies at least that safety floor, but ribs at that point can still be tough. Continue cooking until the rack also passes the tenderness checks below.
ThermoWorks' rib-temperature guide explains why ribs are awkward to measure: narrow meat and nearby bones make probe placement difficult. That is why this recipe does not prescribe one magic finishing temperature. Temperature confirms the safety floor and helps you decide when to begin checking; the rack still has to feel tender.
Use three tenderness cues together
Begin around 3 1/2 hours, checking the thinner rack first.
- Bend: Lift the rack near the center with long tongs. It should bend deeply without breaking into separate pieces.
- Crack: Small cracks should open across the bark at the bend. A rigid surface with no cracking usually needs more time.
- Probe: Slide a thin probe or toothpick into the meat between two bones. It should enter with little resistance in several places.
Bone pullback may appear, but it varies and is not enough by itself. "Fall off the bone" is a texture preference, not the only correct finish. For ribs that hold together when lifted and yield cleanly when bitten, stop when all three cues agree. For a softer result, continue in short intervals and recheck without letting the bark burn.
Should you wrap baby back ribs?
You do not need to wrap them. This recipe stays unwrapped to keep the process simple and preserve a drier, firmer bark. Wrapping traps steam, changes the surface, and can shorten the path to a softer texture, but it also makes the original 3 1/2-to-4 1/2-hour range less useful.
If you choose to wrap, do it only after the rub has set. Use food-safe wrapping suitable for the cooker, keep the packet over indirect heat, and open it away from your face and hands because hot steam and liquid can escape. Record the wrap time and the next tenderness check so you can repeat the result. Treat the wrapped version as a different method rather than claiming it follows the no-wrap schedule.
Glaze only after the ribs are nearly tender
For a glazed finish, brush each rack with a thin layer of barbecue sauce when the bend and probe tests are close. Close the cooker for 15 to 20 minutes, just until the glaze sets. Do not automatically extend that interval to 30 minutes; the correct endpoint is a set glaze that has not scorched. A second thin coat is optional.
Do not reuse a brush or sauce that touched raw pork. Pour the serving sauce into a clean bowl before cooking, or use a clean utensil and fresh sauce at the table.
Move finished ribs to a clean tray. Rest for 10 minutes. Turn bone-side up and use the bones as guides for slicing with a stable board and sharp knife. The rib recipes collection compares cuts and methods using visible cues rather than folklore.
Diagnose a result you want to change
| Result | Likely evidence | Change one variable next time |
|---|---|---|
| Ribs are tough | Probe still drags; rack barely bends | Cook longer at a stable grate temperature before rechecking |
| Bark is soft | Frequent spritzing, wrapping, or heavy sauce | Keep the next cook unwrapped and glaze only near the end |
| Surface is bitter | Dense stale smoke, soot, or scorched sugar | Correct combustion and use less wood; delay sugary sauce |
| Thin end is dry | Rack thickness varies or hot spot is confirmed | Face or rotate the thin end away from the hot zone |
| One rack finishes early | Different thickness or cooker position | Remove racks independently rather than waiting for a pair |
| Flavor is too salty | Rub was not divided evenly or rack was lighter | Weigh the racks and reduce salt, changing no other seasoning |
A dark bark is not proof of clean smoke, tenderness, or burning. Use smell, surface condition, the fire, and the three tenderness cues together.
Cool and reheat leftovers safely
Refrigerate leftover ribs within two hours, or within one hour when the outdoor temperature is above 90°F (32.2°C), in shallow covered containers at 40°F (4.4°C) or below. USDA's pork-storage guidance gives cooked pork 3 to 4 refrigerated days and directs reheating to 165°F (73.9°C).
Reheat only the portion you need. Covering the ribs with a small splash of water or sauce can limit drying; uncover briefly at the end if you want the surface firmer. Check 165°F in more than one meaty location without touching bone.
At 250°F, patience is useful only when the fire and the evidence are being watched. Stabilize the cooker, keep the racks unwrapped, check the bark once it has set, then let bend, crack, and probe resistance decide the finish.